Formula 1 / Rhythm Game Reaction Time Tester
Inspiration
Ever seen this? As a heavy rhythm game player, I’ve always been thinking about the extent reaction time effect F1 driver’s results.
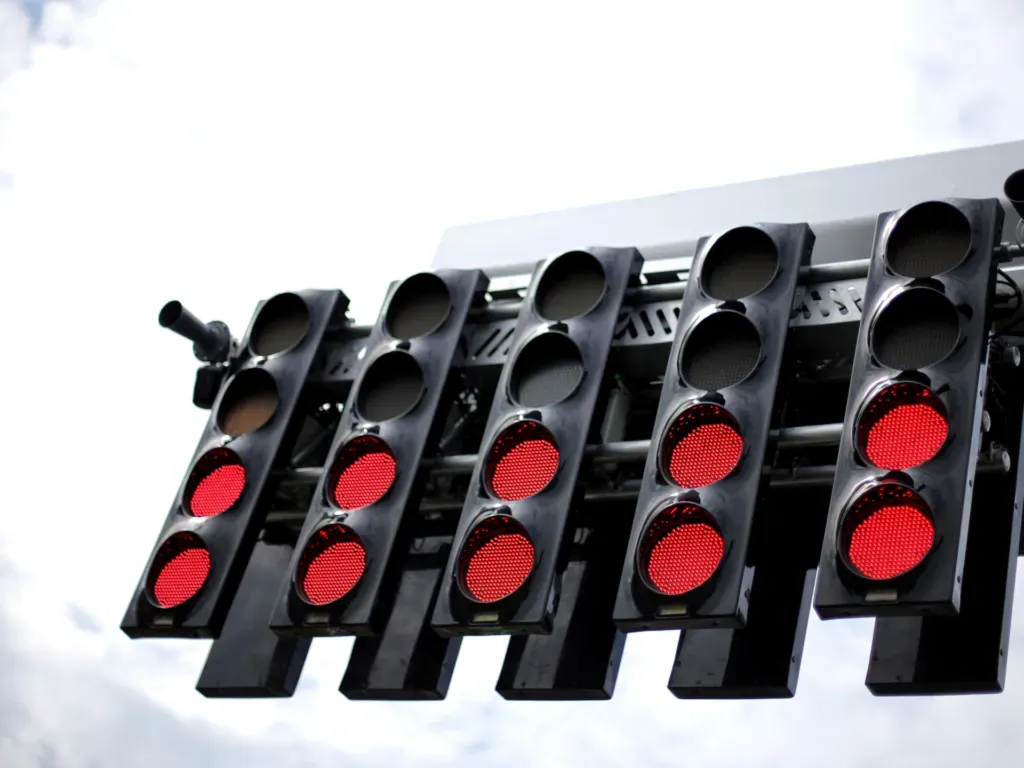
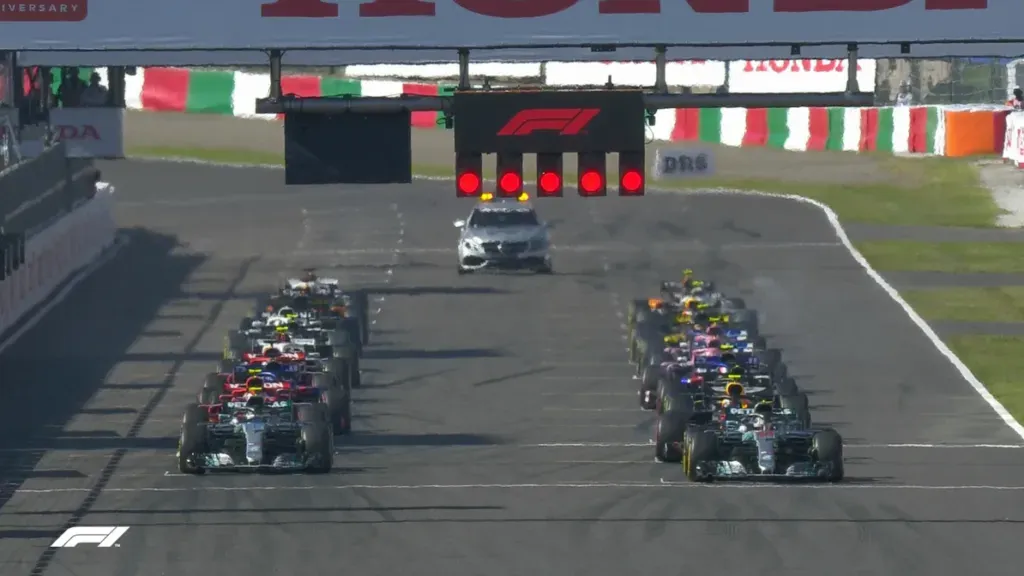
Imagine being like an F1 driver at the starting grid, waiting for the red lights to vanish, and then bam! — hitting the pedal (or in my case, pressing a button) as fast as humanly possible.
If I can’t be an actual F1 driver, at least I can be the speed king on my own arduino racetrack, right? (Also checkout my rhythm game recordings if u’re interested:
Goals
These are some goals for this project to makes it sound more legit:
1. Simulate the F1 Start Lights
Use an LED to mimic the start light, which will light up randomly, prompting me to hit a button asap.
2. Measure Reaction Time
The Arduino will track the time between the LED lighting up and me pressing a button, then display it on the serial monitor. Let’s see if I’m as fast as I think!
3. Increase the Challenge
Each time I succeed, the random interval before the LED lights up gets shorter and shorter, testing if my reaction time can improve to F1 driver levels.
If my reaction time is good enough, should I sign up for F1 driver training? Dream big they say
Circuit Design and Wiring
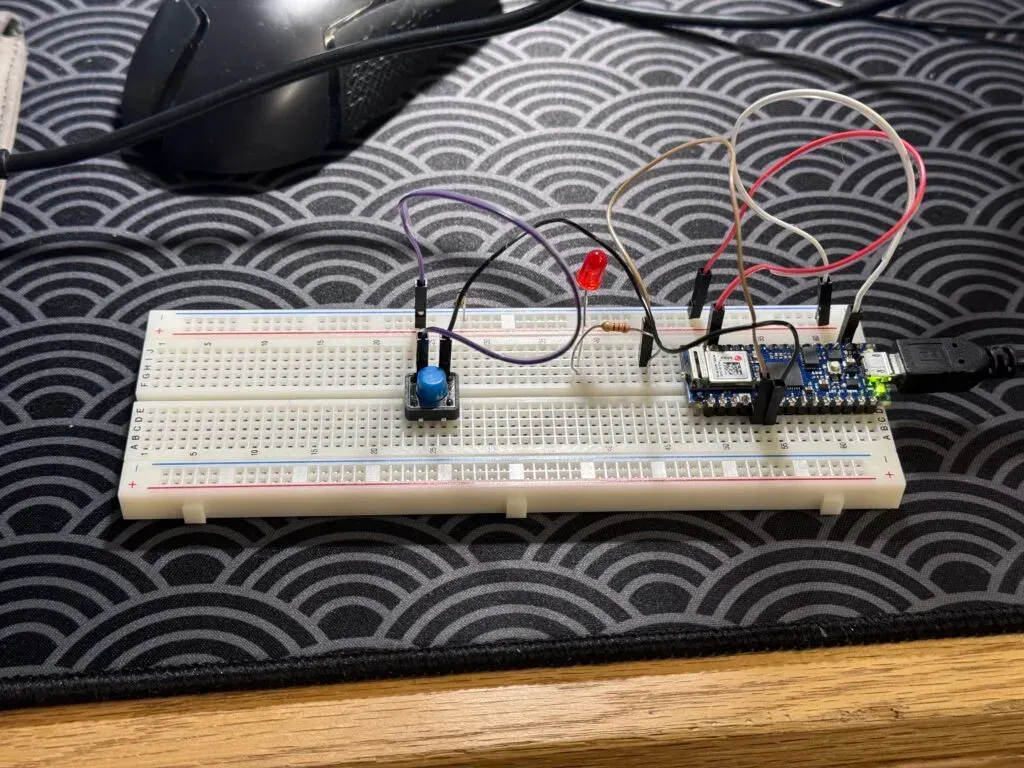
Here’s the setup:
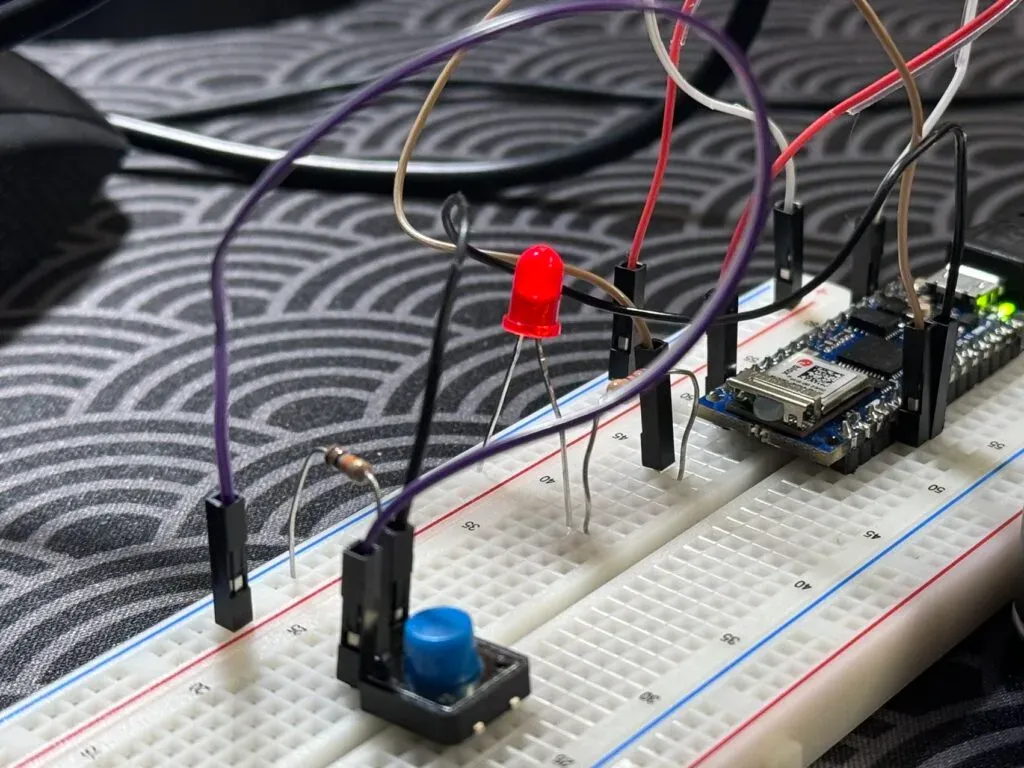
– 1 LED: My trusty start light.
– 1 Button: To keep me stressed.
– Arduino Nano 33: My faithful companion, the brain behind this.
– Breadboard and Jumper Wires: A bunch of wires crisscrossing like I’m setting up a mini rocket launchpad.
The wiring process went smoothly, although my resistor seemed to have a life of its own when it roll off the table. It took me one entire day to find it. A lesson learned the hard way: Always grab extra resistors when you’re at 370 J…
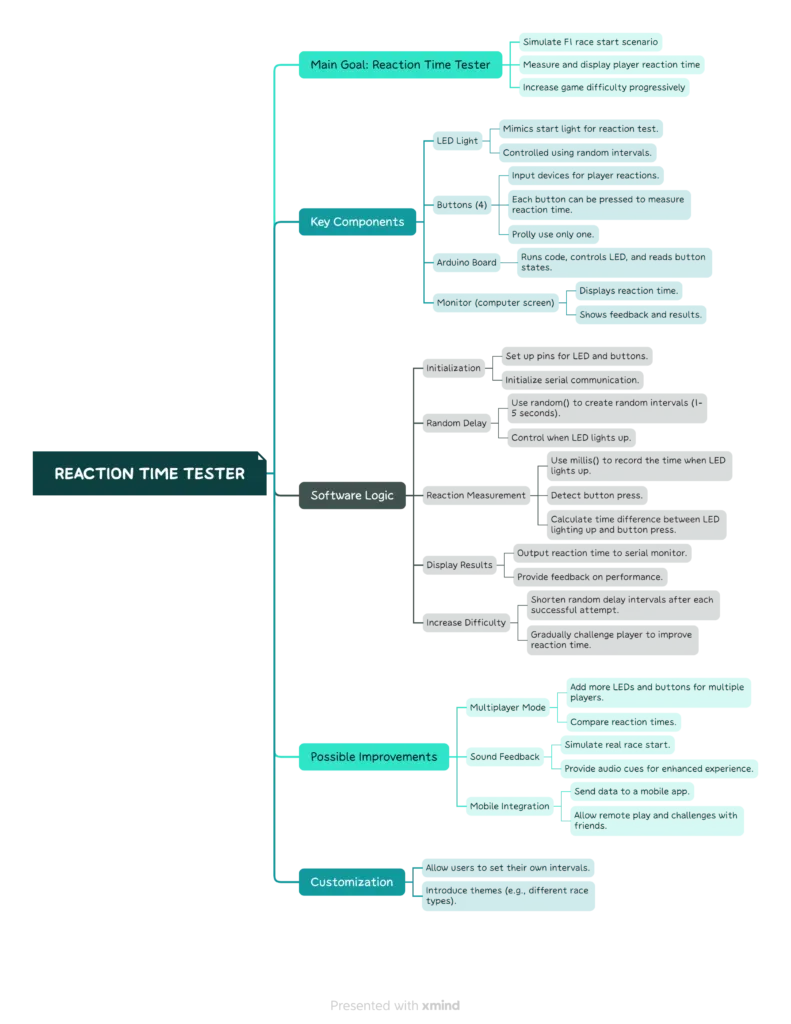
Mind Map
Coding
Now for my favorite part: writing the code!
I grabbed my keyboard and started typing away, with a simple but effective plan:
– Use `random()` and `millis()` functions to create a random delay between 1 and 5 seconds.
– Record the time when the LED lights up, then wait for me to press any button. Calculate the time difference.
– Output my reaction time to the serial monitor, revealing just how quick (or slow) I actually am.
Here’s the code at first:
const int ledPin = 2; // LED connected to pin 2
const int buttonPin = 3; // Button connected to pin 3
long reactionTime;
long ledOnTime;
bool ledIsOn = false;

void setup() {
  Serial.begin(9600); // Initialize serial communication at 9600 baud rate
  pinMode(ledPin, OUTPUT); // Set LED pin as output
  pinMode(buttonPin, INPUT_PULLUP); // Set button pin as input with internal pull-up resistor
}

void loop() {
  if (!ledIsOn) {
    delay(random(1000, 5000)); // Random delay between 1-5 seconds
    digitalWrite(ledPin, HIGH); // Turn on LED
    ledOnTime = millis(); // Record the time LED lights up
    ledIsOn = true;
  }

  if (digitalRead(buttonPin) == LOW && ledIsOn) { // Check if the button is pressed
    reactionTime = millis() - ledOnTime; // Calculate reaction time
    Serial.print("Your reaction time is: ");
    Serial.print(reactionTime);
    Serial.println(" ms!");
    digitalWrite(ledPin, LOW); // Turn off LED
    ledIsOn = false;
  }
}
Debug
The code is working, but only the “LED flickers at a random time part” works.
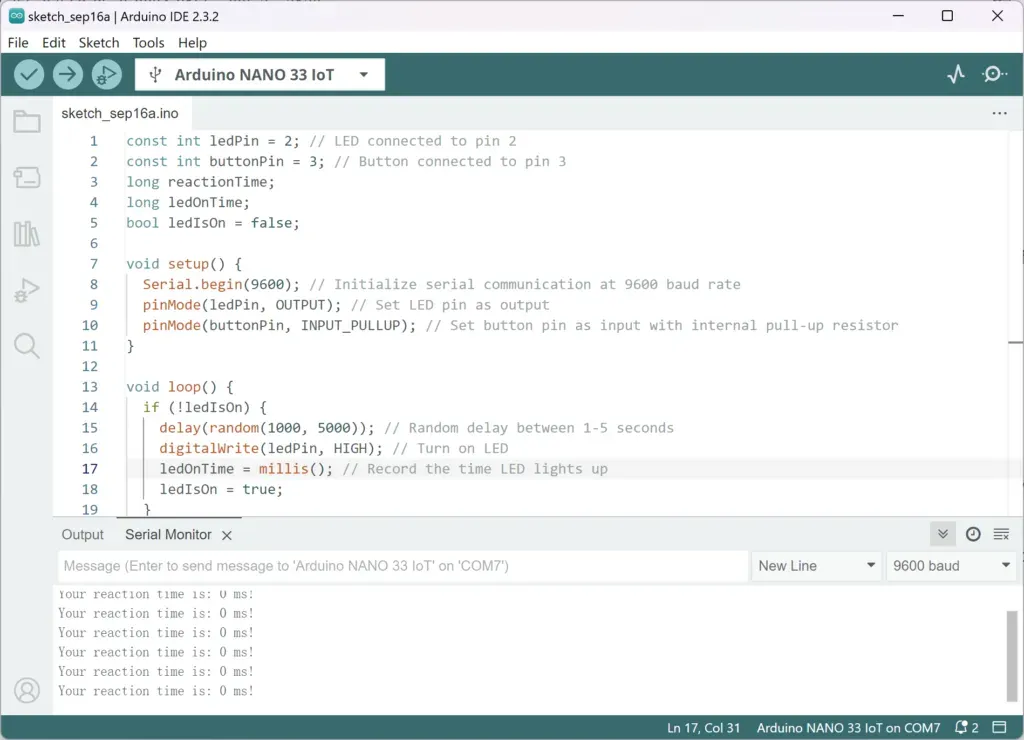
Looks like the code is continuously detecting the button press as soon as the LED turns on, resulting in the output of “Your reaction time is: 0 ms!” repeatedly.
New Logic:
- The LED will blink three times to signal that the reaction test is about to begin.
- After blinking, there will be a random delay between 1 to 5 seconds. The LED will then light up, signaling me to press the button as quickly as possible.
- When I press the button, the program will calculate the reaction time in milliseconds and display it on the Serial Monitor.
- The program will only perform one loop and will not continuously check for button presses.
Final Code
// Define the pin numbers
const int ledPin = 2;    // LED connected to digital pin 2
const int buttonPin = 3; // Button connected to digital pin 3

// Variables to store the time
unsigned long startTime;
unsigned long reactionTime;

void setup() {
  pinMode(ledPin, OUTPUT);          // Set the LED pin as output
  pinMode(buttonPin, INPUT_PULLUP); // Set the button pin as input with internal pull-up resistor
  Serial.begin(9600);               // Initialize serial communication

  Serial.println("Reaction Time Tester Initialized.");
}

void loop() {
  // Blink the LED 3 times to signal the start of the reaction test
  for (int i = 0; i < 3; i++) {
    digitalWrite(ledPin, HIGH);   // Turn the LED on
    delay(200);                   // Wait for 200 milliseconds
    digitalWrite(ledPin, LOW);    // Turn the LED off
    delay(200);                   // Wait for 200 milliseconds
  }

  Serial.println("Get ready...");

  // Generate a random delay between 1 to 5 seconds
  long randomDelay = random(1000, 5000); // Random delay in milliseconds (1 to 5 seconds)
  delay(randomDelay);

  // Light up the LED to signal the user to press the button
  digitalWrite(ledPin, HIGH);
  Serial.println("Press the button now!");

  // Record the start time
  startTime = millis();

  // Wait for the button press (button pressed when reads LOW due to INPUT_PULLUP)
  while (digitalRead(buttonPin) == HIGH) {
    // Do nothing while waiting for the button to be pressed
  }

  // Debounce delay: Wait a short period to confirm the button press
  delay(50);
  while (digitalRead(buttonPin) == LOW);  // Ensure the button is released

  // Button has been pressed, calculate the reaction time
  reactionTime = millis() - startTime;

  // Turn off the LED
  digitalWrite(ledPin, LOW);

  // Display the reaction time on the Serial Monitor
  Serial.print("Your reaction time is: ");
  Serial.print(reactionTime);
  Serial.println(" milliseconds");

  // Wait for a short period before restarting the loop
  delay(2000);  // Delay for 2 seconds before restarting the test
}
Results
I’m so pro. Not quite F1-level, but at least faster than my grandma (just kidding, she’s actually pretty quick!).


After each test, I tweaked the random time interval to make the LED light up more frequently, adding a bit more challenge. I even tried pressing the buttons with my left hand to see if I could train my brain to balance — turns out my left hand is way slower.
My left hand is so slow; I think I’ll stick to the right hand. Maybe this is step one to becoming an F1 driver?
Conclusion
I could make it harder by shortening the random time interval even further or maybe add sound feedback (like a “beep”) to make the experience more realistic.
I’m also considering adding multiple LEDs and buttons for a multiplayer reaction challenge or integrating the data with a mobile app so everyone can join in on the fun. 😈
This was a simple but super fun project that gave me a taste of the adrenaline rush that F1 drivers must feel (even if it was just for pressing a button). Hope you enjoyed reading the whole thing!!